So after a rather long delay caused by her sudden bereavement in the family, I've decided to start miniature painting again. I was working on some Imperial Fist Primaris Marines, which I was doing with contrast paint, and to be honest; I wasn't really happy with them. Given that I was working on them at the time my father died; I don't particularly want to work on them, especially as I'm not happy with them. So that'll be some time in the biostrip when I get some and I'll restart them at some point in the future. To be honest though I am not that interested in 40k at the moment anyway. It just feels a bit repetitive and I had painted a lot of it in March. Just before the unplanned stop though, I did receive the new starter set from Bushido, the miniatures game inspired by Japanese history and mythology and I decided I would use this to get back into things.

I have not actually played the game yet. But I had been impressed with the previous box set which had the six metal miniatures in. I'd seen the reveal of the new version at adepticon this year and pretty much ordered it on spot. I'll attach some images of the box and everything in a future post. But I have to say the slightly increased price point was offset by the fact that it's now ten Miniatures rather than six and the fact that these are in resin rather than metal was a nice surprise. Whilst I accept that metal is more solid, I do find working with it a little bit of a faff though, equally, I'm not a huge lover of resin after years of having to struggle with Games Workshop or Forgeworld models. So I picked one at random which is the one below no idea of what she's called. I'll figure that bit out later.
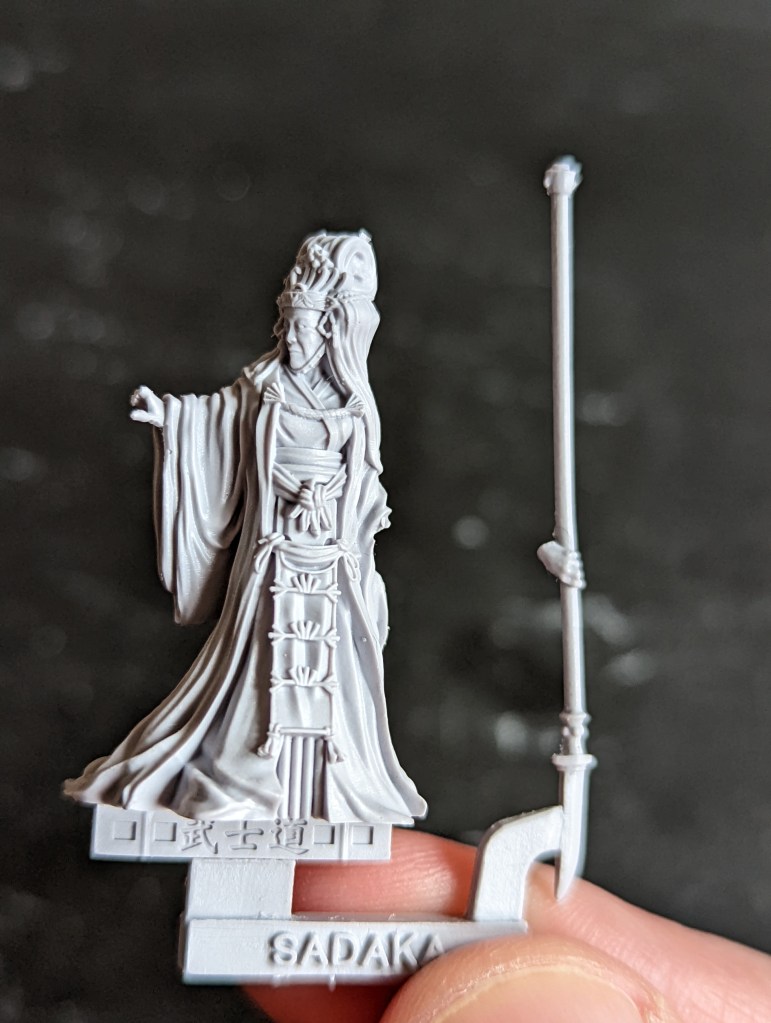

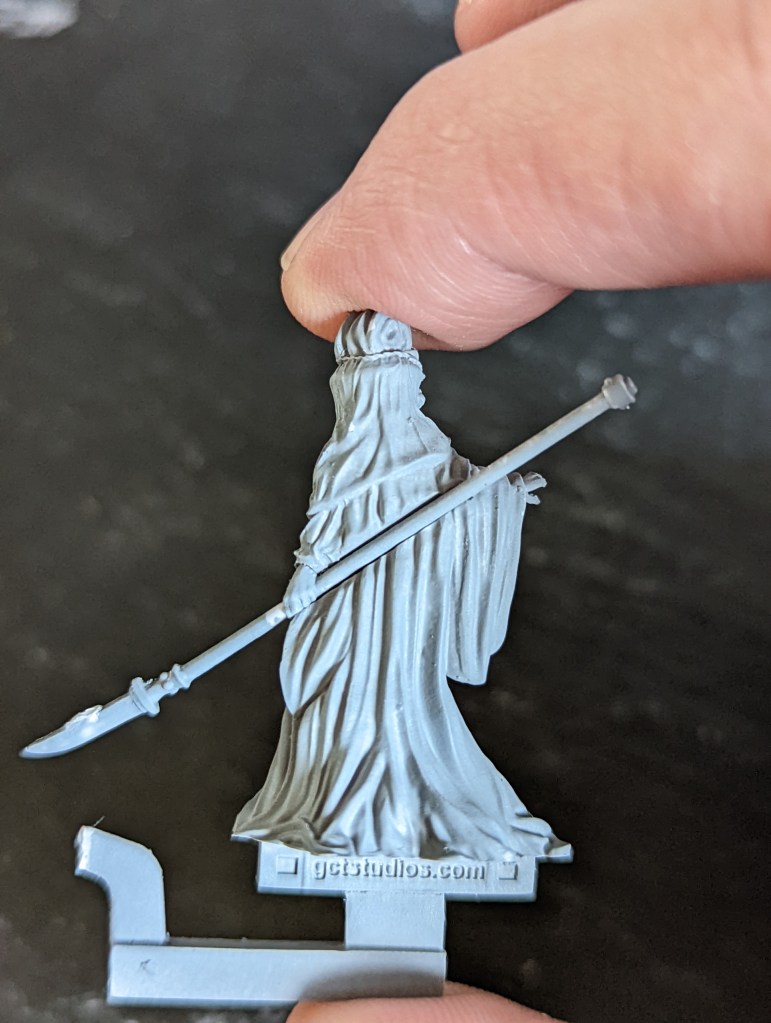
My immediate thought on seeing it was that the quality is really crisp, plenty of detail. looks sharp can't see any particular mould lines that are obvious part of smile bit on the top of the head, which will be easy to remove. And everything looks pretty well cast. The spear is actually very flexible and looks relatively straight. To should be relatively easy to work with. But I was pleasantly surprised with was the fact that when I turn it around, there is a slot or a groove actually cast into the back, which is fantastic. It's clear this is where the spear goes. And it means I'm not going to be stuck with an absolute minuscule point of contact that will snap off fly off at the slightest impact. Probably not going to pre assemble. Before building though I'll do a test fit and just have a look just in case this filling needed. If this fill in needed then I'll probably have to pre assemble. But if I can get away without doing that. And paint them in sub assemble it then I would prefer to do it. But next up on this one is a little bit of cleanup. Then soap wash just to get any release age enough. And then we'll give it a go get it primed, weather permitting and see where we go from there.
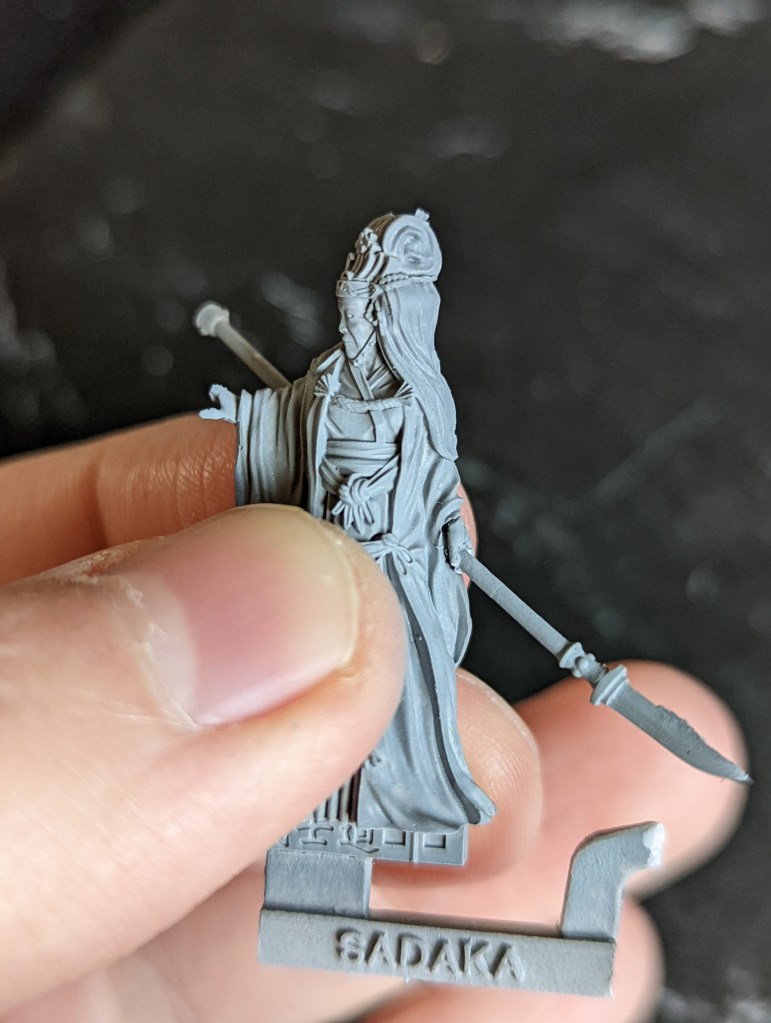
Okay so as we can see once the model have been cleaned and then primed using Halfords grey primer, the details look pretty sharp. I did overlook the little burron top of the head so had to remove that and then just do a little bit of a touch up with a matching paint but all in all, it took the paint pretty well. I did a test fit with the staff and it does look like there's not going to be any filling required; which is great means I can work on it in sub assemblies.

Decided to start first with the staff using a flat matte black. I chose the pure oxide black paint from instar paints I must be honest I do like this range. Sometimes need a couple of coats but it is very easy control what with with it being pre thinned and is great value for money. The pommel and the cross brace I did in Retributor Armour from GW. It is probably one of their better metallic paints and quite easy to work with. For the blade at this stage I just put on a medium grey from the Dungeons and Dragons pigment range that I have with a highlight just on the edge of the blade with a lighter grey and then a fine edge of pure white. I may go back and have another crack at an NMM in the future, but we'll see. The biggest problem I had here it was what I thought would be a problem and that's the springiness of this bit of the model. It's great that it's flexible in that it's going to be more resilient, but it did make painting it a little bit fiddly. I found myself having to try and hold it at each end. Paint it to stop it moving around, and certainly wouldn't fancy free handing any details on the shaft. It's definitely better than the rigid casting that Games Workshop have done with models like the Necrons; but this does feel like it's going a little too far the other way.

I then turned to to the flesh on the hand and the face. So for the flesh I did a one to one mix of Rekarth flash (GW) and elf flesh(vallejo). However, this was a little too grey and alabaster so I mixed in a little bit of pale flesh (vallejo) to give it a little bit of colour. I did want to keep it quite an aged look so tried to avoid going to strong on the colour. Applied that mix in a couple of thin coats and then did some shading, I am not very good with faces and skin tones but by adding a little bit of Reikland flesh shade (GW) into the colour mix it seems to work pretty well. I did have a crack at the eyes using a pale grey and then edge lining with black but it made it look like a panda. So I've painted over that. Think the mistake I made there was going on the top and the bottom of the eye. When I go back at the end I'll probably just do the top as that looked okay.
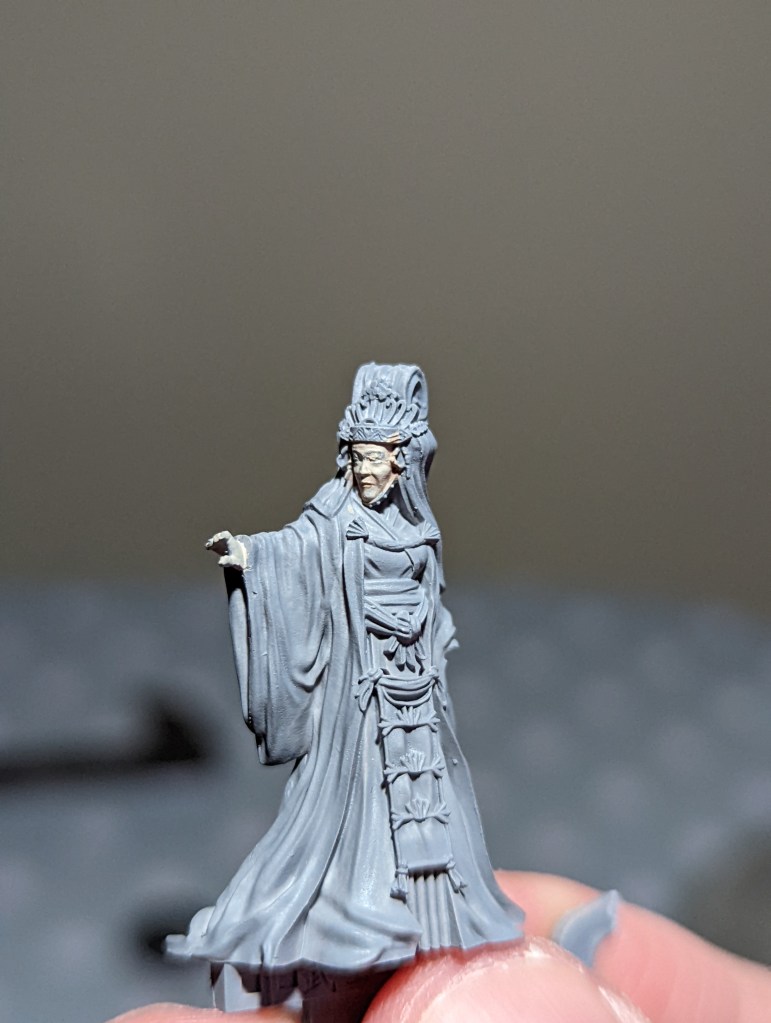
For the moment that face well they then started to work on the main body of the model. So the on the piece of the robe I did using the pure oxide yellow from instar paint and then add in some shade in layers of Agrax earth shade (GW).

Next up was the tabbard. Did this using zandri dust (GW) with the recesses shaded with a little bit of agrax earthshade. The edges were then carefully done in a pure white from army painter. The same white was used for the edge of the under robe and the hair piece below the crown. The crown and band looked a little bit flat so I shaded lightly using basillicanum grey (GW) very heavily thinned down with water+ (instar) and applying in a few thin layers.
That left the robe which was painted using army painter goblin green. I then tried to shade it using the greenskin but it was not giving the effect that I wanted so I ended up using the black-green ink from Vallejo and then using a drybrush of instar lime green to highlight. The ends of the sleeve used zandri dust and I went back to the retributor armour for the thread on the front. The final bit of hair was done in matter lack with a dry brush grey for a highlight and an aged look. The end result is below.
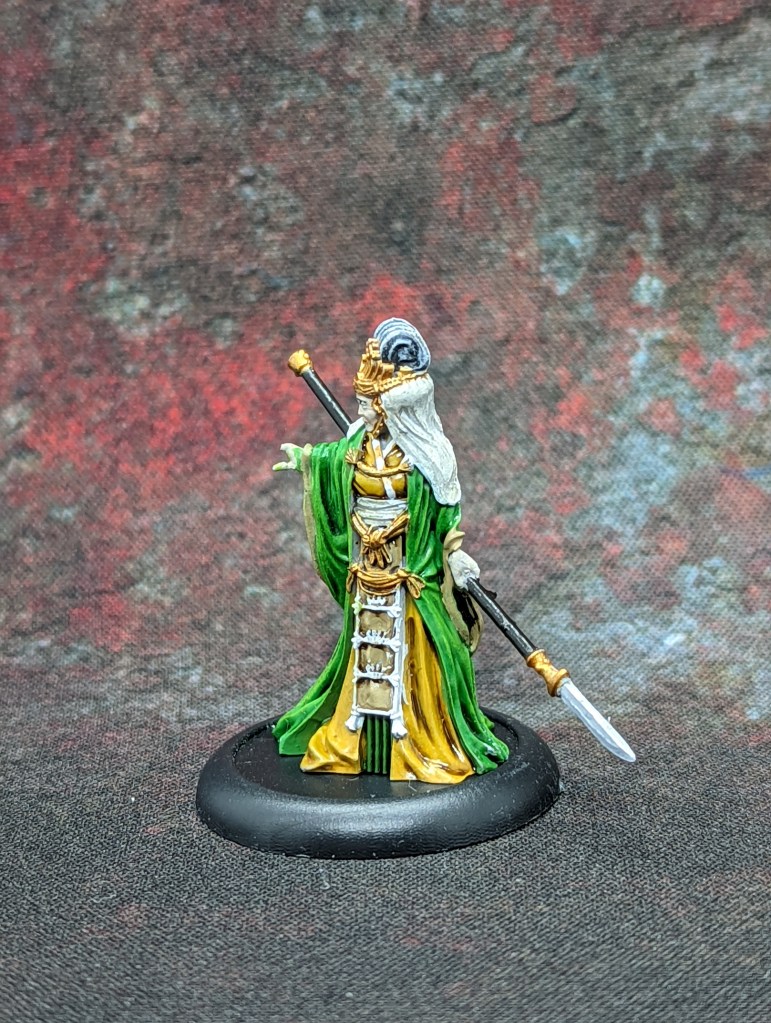
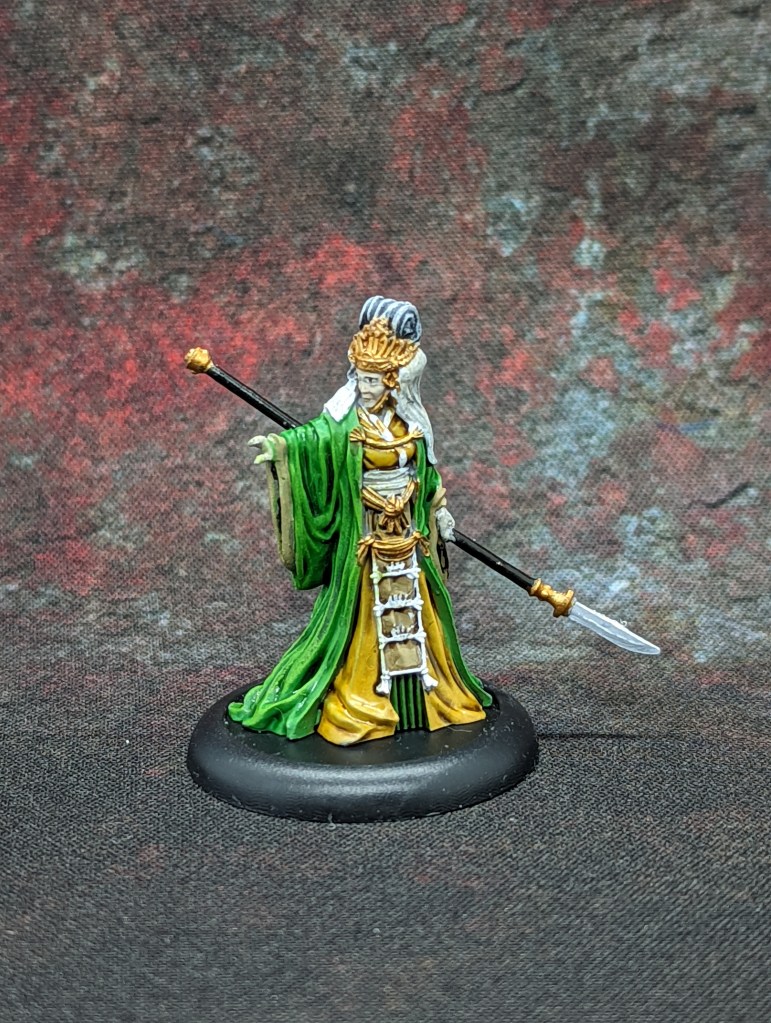
All in all I am pleased with how this one turned out. I will need to get a texture roller to make the base I want but for my first effort in a while this was a really enjoyable model to work on.
